Sailor’s Abyss is a ring-shaped island in a forgotten corner of the sea, filled with ghostly spectres, undead crew men, water elementals, and deadly flora. At the center of the island is the shipwreck that holds Sinthara, the Sea Witch. She commands legions of undead with her deadly siren song, threatening to expand her reach beyond the sea.
Sailor’s Abyss Map
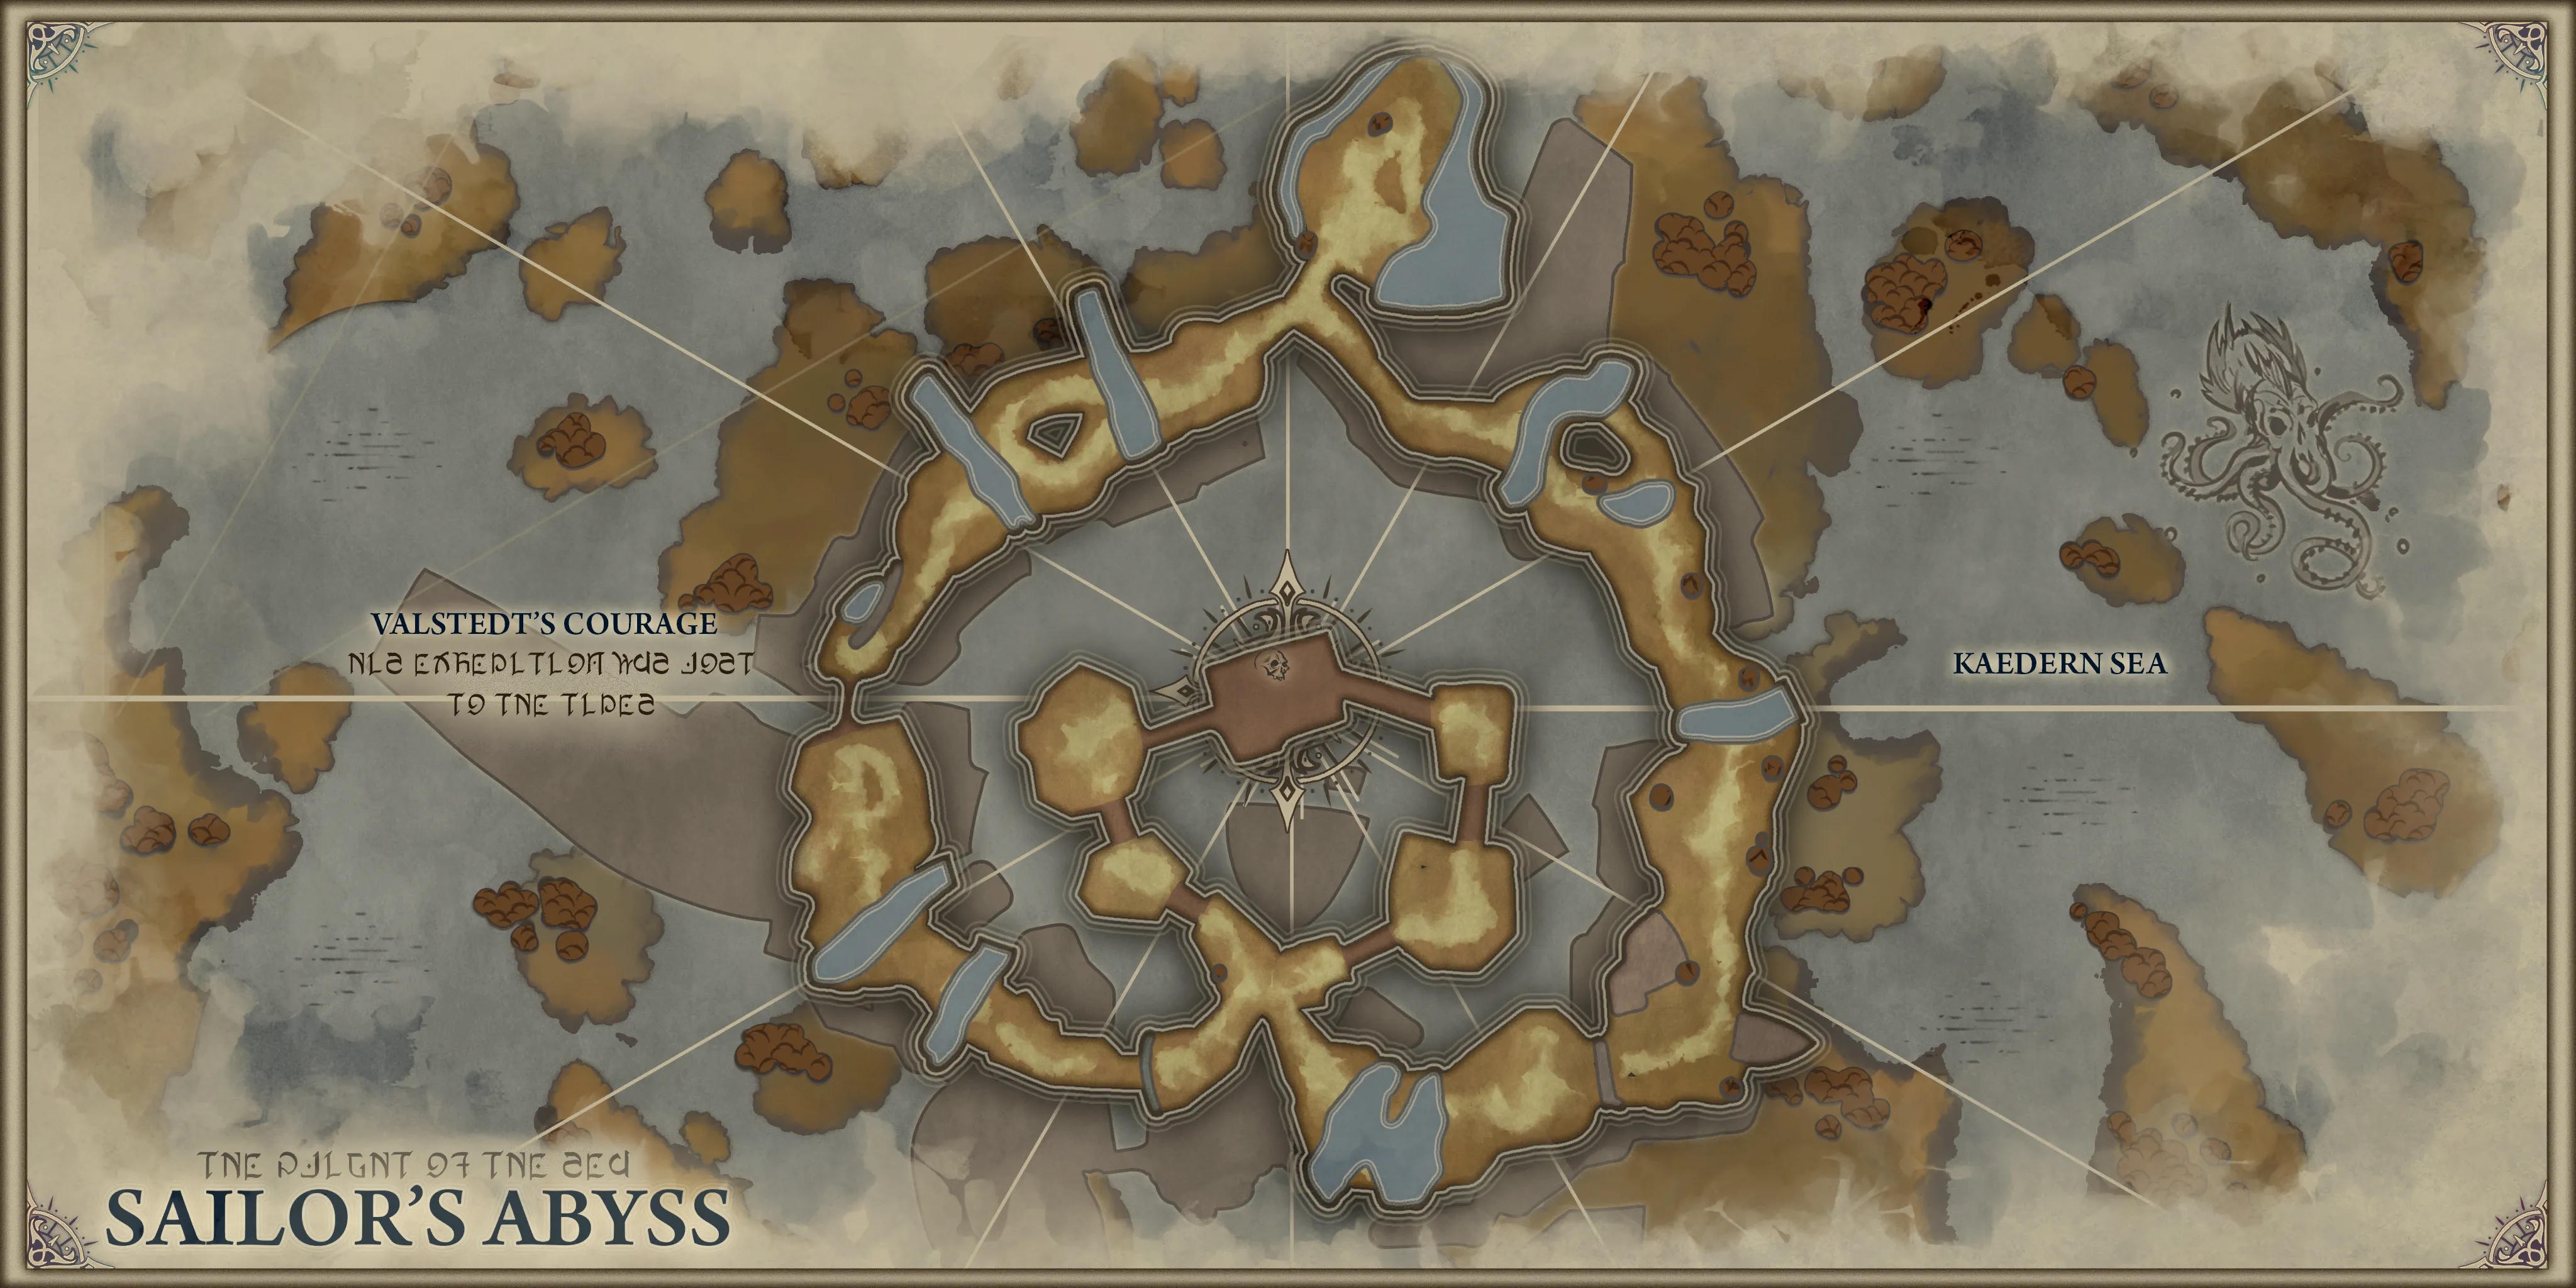
This map has a few rivers flowing through it that can carry you away and off the edge of the island in its currents. Make sure that doesn’t happen!
Sailor’s Abyss Trash Mobs
| Enemy | Name | Score | Stunnable | Abilities |
|---|---|---|---|---|
 | Witchreef Lasher | 1 | Yes | Auto Attack Basic melee physical damage attack Witchreef Toxin Every 12 seconds, apply a stackable, dispellable DoT in an area around itself. |
 | Water Elemental | 3 | Yes | Auto Attack Basic melee physical damage attack Healing Waters (Interruptible) (Priority) After 3 seconds, heal 1 target within a 40yd range for a significant amount. 20 second cooldown. Hydrobolt (Interruptible) Aim at a target outside of melee range and within 40 yds. After 2 seconds, deal a large amount of damage to the target and others within radius. |
 | Vengeful Shade | 3 | Yes | Auto Attack Basic melee physical damage attack Bitter Frenzy Increases Haste of target by 30%. Curse of Drowning Apply a dispellable debuff that slows throughout the duration and does heavy DoT. |
 | Tormented Spectre | 2 | Yes | Auto Attack Basic melee physical damage attack Anguish Unleashed (Interruptible) (Priority) Deal a large amount of party-wide damage. |
 | Hollowed Corsair | 5 | No | Auto Attack Basic melee physical damage attack Wailing Strike (Adept+) Swing at your target, cleaving all those in its path and applying a stack of Bleed to the target. |
 | Forgotten Soul | 1 | Yes | Auto Attack Basic melee physical damage attack |
 | Fading Raider | 2 | Yes | Auto Attack Basic melee physical damage attack Fervor Increase Haste by 2% per stack. Gain a stack on hitting by attacking. |
 | Deepbound Magi | 5 | Yes | Auto Attack Basic melee physical damage attack Necrotic Bolt (Interruptible) Cast a damage dealing bolt at your target. Call of the Abyss (Interruptible) (Priority) Deal a large amount of party-wide damage and apply a stack of the dispellable debuff that Increases magic damage taken by 50%. Harrowing Solitude (Adept+) Target a random player with an AoE. On expiration, deal a large amount of magic damage divided equally among all players within the AoE. |
Notable Trash Enemy Abilities
Sailor’s Abyss is a DoT heavy dungeon and it is recommended to utilize the Ancient Wardstone relic, if you have it available.
Witchreef Lashers periodically cast Witchreef Toxin, a stackable DoT that is applied to all allies within range. This is dispellable and it is recommended to dispel before reaching 5 stacks or more.
Water Elementals will NOT cast Hydrobolt if all party members are within melee range of them. This means you will only need to interrupt/kick their Healing Waters cast.
When facing Vengeful Shades, healers need to be ready to dispel the Curse of Drowning from whoever ends up with it after the ability is cast. Curse of Drowning is a high damage DoT that can easily get out of hand if left alone.
Tormented Spectres have a high damage cast that needs to be prioritized for kicks/interrupts. If you let two Tormented Spectres cast their Anguish Unleashed ability, the only one left alive in your party afterwards might be the tank (and not for long).
When pulling a Hollowed Corsair in Adept+, it is important that no one stands next to the tank. They have a cleaving strike, Wailing Strike, that will deal a good amount of damage as well as apply a stack of bleed. It’s recommended that the tank begin to kite the Hollowed Corsairs when they have about 4 stacks of bleed. Kite them until the bleed expires and then resume tanking as usual.
Fading Raiders aren’t too hard to deal with early in a fight, but will ramp up the frequency of their attacks as the fight goes on due to their Fervor ability.
Deepbound Magi have two important skills to pay attention to: Call of the Abyss and, once you reach Adept+, Harrowing Solitude.
- While Necrotic Bolt is interruptible, it’s recommended to save your interrupt ability for Call of the Abyss instead.
- Call of the Abyss will deal a large amount of damage to the entire party. This can be deadly if your party isn’t able to interrupt the ability in time.
- Harrowing Solitude is a Soak ability that deals a large amount of damage divided among all party members within the zone when it detonates. If this is not targeting the tank, make sure that all party members are within the zone before Harrowing Solitude detonates.
Route
We will go over one of the possible routes in Sailor’s Abyss. When choosing a route to take, we must remember to avoid pulling more than three caster mobs with priority interrupts and avoid overcapping the Kill Score requirement. The route we have chosen optimizes the amount of casters to focus on in each pull and only goes over the Kill Score requirement by 1 point (approximately 0.76%).
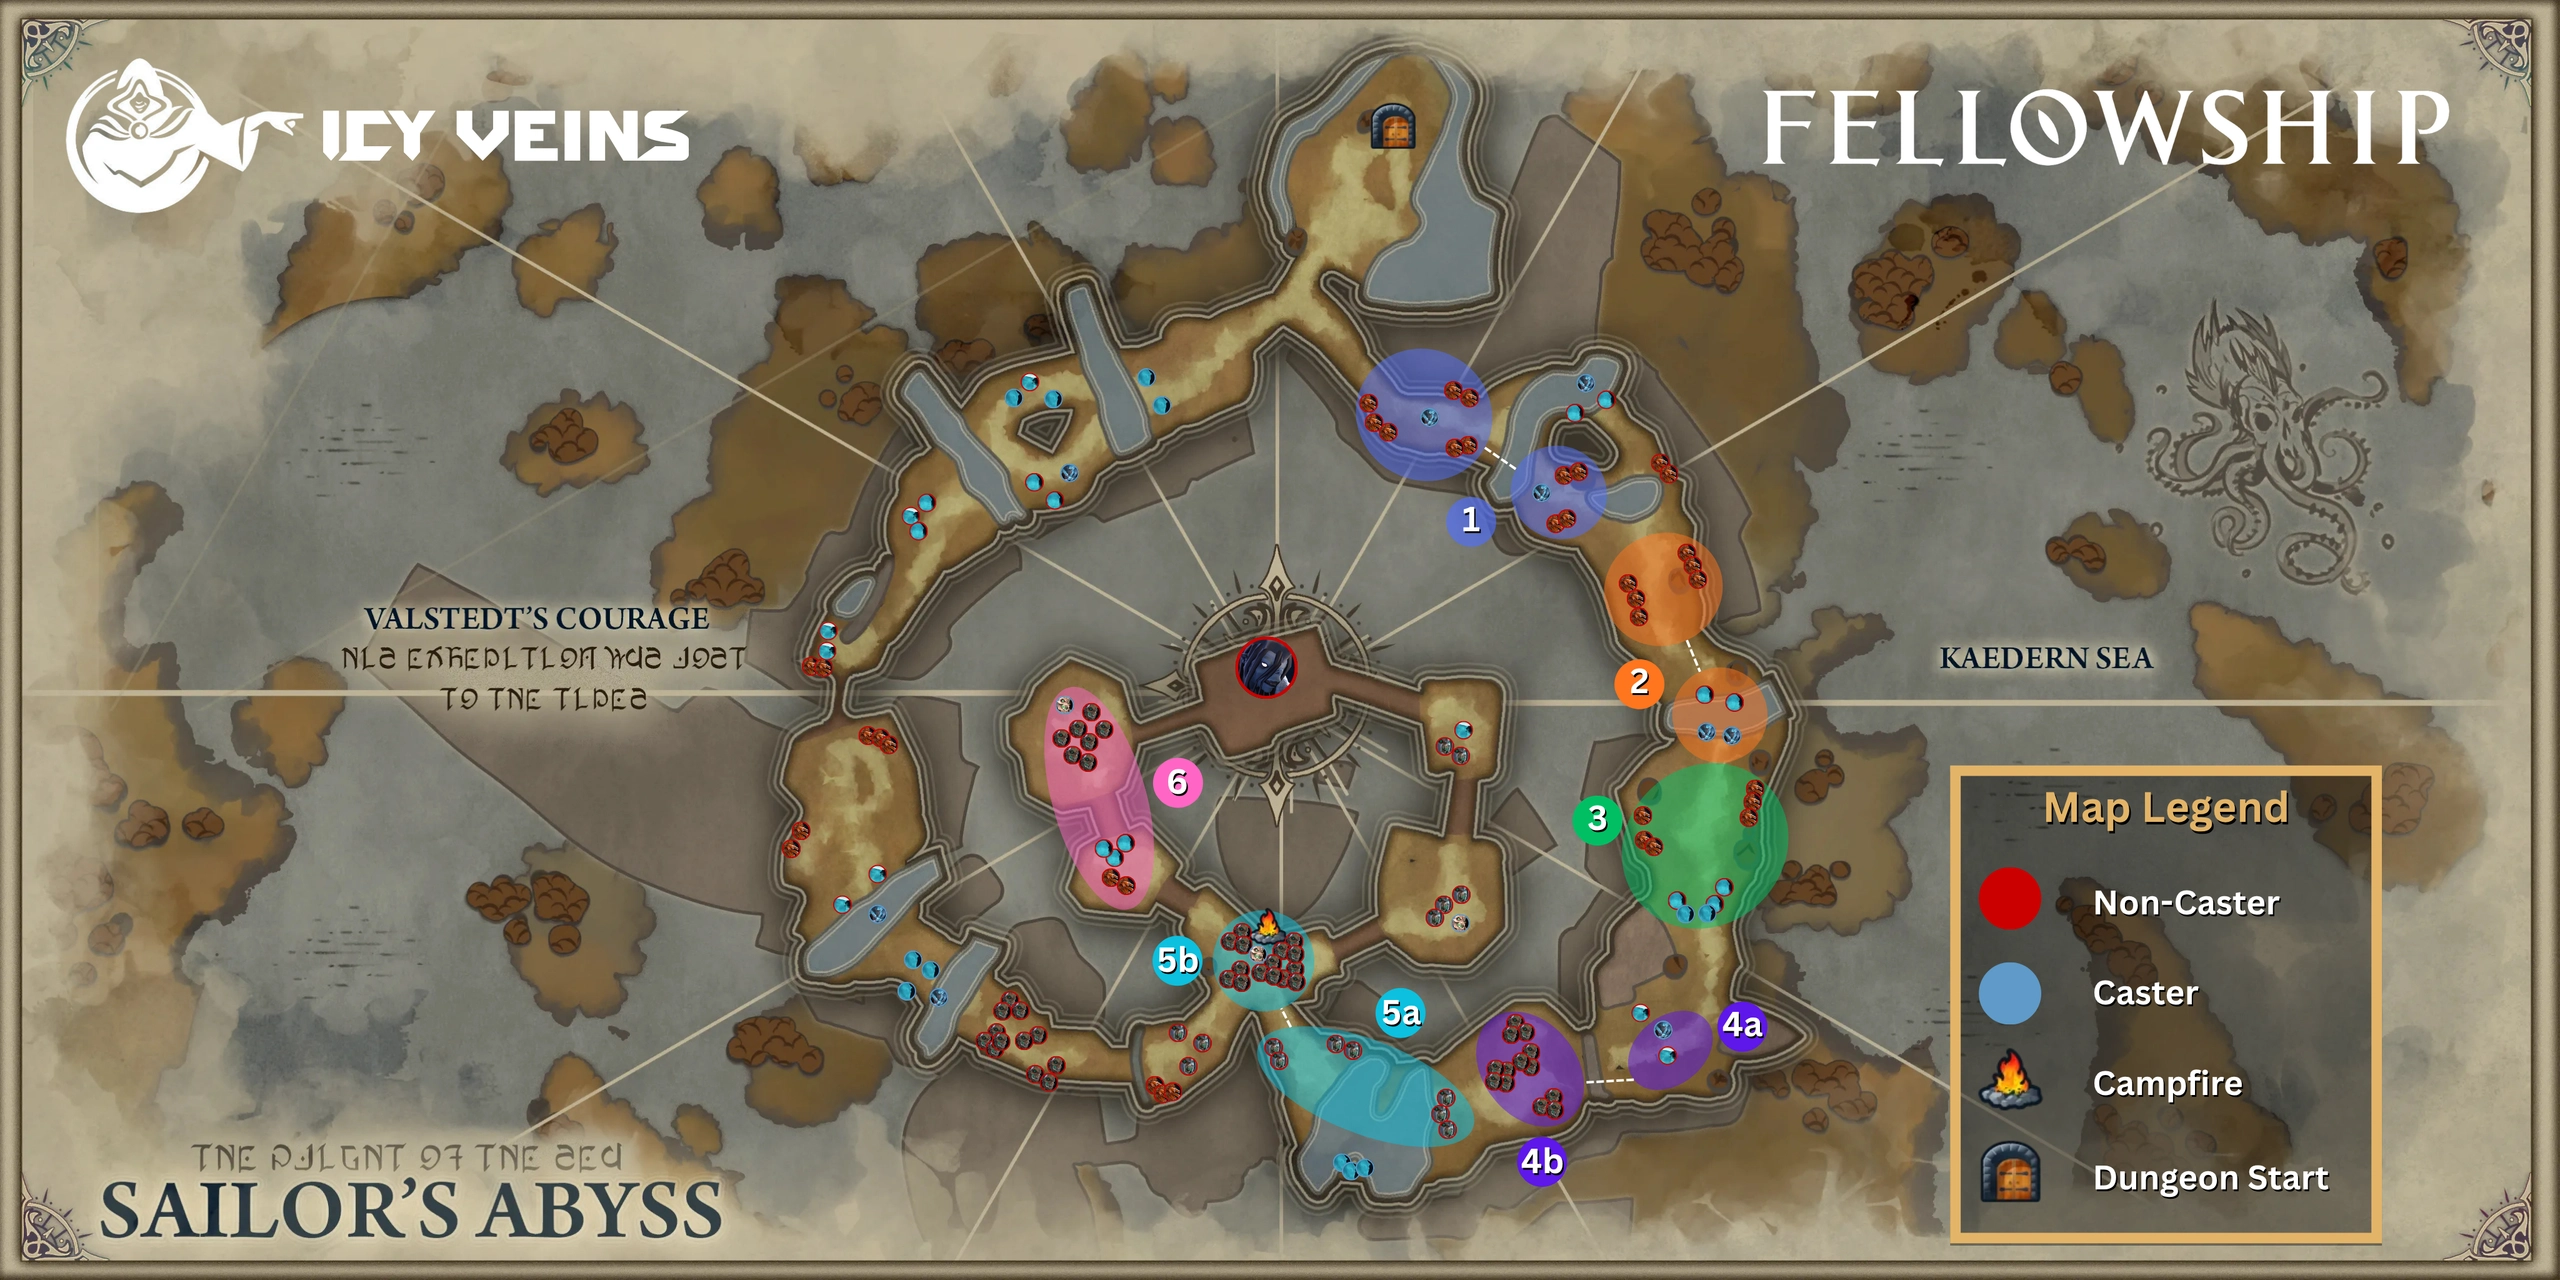
| Pull | Pull Size | Kill Score | Enemies |
| 1 | 13 | 17 | 11 Witchreef Lashers and 2 Water Elementals |
| 2 | 10 | 18 | 6 Witchreef Lashers, 2 Water Elementals, and 2 Vengeful Shades |
| 3 | 11 | 19 | 6 Witchreef Lashers, 3 Vengeful Shades, and 2 Tormented Spectres |
| 4a | 2 | 8 | 1 Hollowed Corsair, 1 Water Elemental |
| 4b | 13 | 13 | 13 Forgotten Souls |
| 5a | 7 | 14 | 7 Fading Raiders |
| 5b | 13 | 20 | 12 Forgotten Souls and 1 Deepbound Magi |
| 6 | 13 | 23 | 2 Witchreef Lashers, 3 Vengeful Shades, 7 Forgotten Souls, and 1 Deepbound Magi |
| Total Score | 132/131 |
This guide will refer to the different pulls by their corresponding number on the above map and table.
1. After spawning into the dungeon, we take a left into the first pull.
If you’re the Tank, make sure that you and the mobs are not in the river so that you don’t get washed away.
When dealing with Water Elementals, everyone needs to make sure to stand within melee range to prevent them from casting Hydrobolt. Hydrobolt is interruptible and should be kicked if it’s being cast, but it’s generally much simpler to have everyone stay in melee range so the only interrupt to focus on is their Healing Waters cast.
Witchreef Lashers will be applying their DoT in an AoE around them. 1-3 stacks is easy to heal through, but be ready to dispel the Witchreef Toxin once it reaches 4 or more stacks.
2. Stand melee range of the Water Elementals and interrupt their Healing Waters cast.
If you’re the party’s healer, watch out for the Vengeful Shade. Vengeful Shades will apply a DoT, Curse of Drowning. Be ready to dispel the Curse of Drowning when you see it. As with the previous pull, also dispel the Witchreef Toxin once it reaches 4 stacks.
3. The Tormented Spectre’s Anguish Unleashed ability does a large amount of party-wide damage if the cast goes through. Make sure that each Tormented Spectre has interrupt focus set by one of your DPS and/or Tank. Interrupt focus will show your hero icon to show whether you have your interrupt ability available to use or not. The keybind for this is “V” by default.
As with the previous pull, dispel Curse of Drowning and Witchreef Toxin as needed.
4a. This pull can be combined with 4b, but is only recommended if one of your DPS has ult to use. Try to hug the left side of the wall to only grab 1 Hollowed Corsair and the 1 Water Elemental. Be wary in Adept+ about the Bleed stacks and cleave from the Hollowed Corsair’s Wailing Strike. If you have 4 or more stacks of Bleed, try to kite until the Bleed stacks fall off. Try to make sure that everyone is in melee range of the Water Elemental.
4b. There’s not much to be worried about since the Forgotten Souls only have a regular melee attack.
5a. Can be combined with 5b, but this is only recommended if one or both of your DPS have their ult ready to use. The Fading Raiders ramp up their Haste with each attack. Things can get dicey if these guys are left alive for too long, which is why we recommend to make sure your DPS has an ult if you choose to pull the Fading Raiders into the 5b pack.
5b. Make sure that you interrupt the Call of the Abyss from the Deepbound Magi. When doing this dungeon at Adept+, be ready to soak with your teammates when Harrowing Solitude comes out.
6. As with the previous packs, make sure you dispel the Curse of Drowning and Witchreef Toxin DoTs and watch out for the Deepbound Magi’s Call of the Abyss and Harrowing Solitude.
Sailor’s Abyss Boss Guide
The Sailor’s Abyss boss fight is against Sinthara. This fight requires careful positioning throughout the encounter, including playing around the mast at the center of the arena to prevent your party from wiping. This dungeon becomes one of the easier options to pick once you and your party members get into the rhythm for this boss.
Sinthara’s Abilities
| Name | Recast | Interruptible | Description |
|---|---|---|---|
| Undertow | 30s | No | Target 2 players besides the one with aggro. Apply Undertow: When the effect ends, or is dispelled, leave a Watery Grave where you stood. Watery Grave: You are Silenced, Slowed, and are taking damage over time. |
| Binding Strike | 30s | No | Connect the current target with 1 other random party member. Targets take damage over time which is increased the further they are from each other. |
| Deafening Screech | 23s | No | After a 2 second channel, deal high damage to all targets within line of sight and interrupting their casts. Players who are interrupted in this way are silenced for 4 seconds. |
| Siren Song | N/A | No | After reaching 50% health, Sinthara will appear at the edge of the ship and begin her Siren Song. Players are silenced and uncontrollable as they are forced to run towards her to their doom. |
| Necrotic Wave (Adept+) | 26s | No | Target a random player with a large frontal attack. After 3 seconds, deal damage and knock back any party member caught in the attack within line of sight. |
Before the Fight
Make sure your healer has mana before engaging. Plan to stay close together and play around the mast in the center of the boss arena.
Remember: Keep yourself healthy by avoiding as much damage as possible. Dying can lead to a wipe.
Sinthara
It is ideal to tank Sinthara adjacent to the mast and for the rest of the party to stand close by, ideally everyone stacking on the same side of the mast. The reason for this is to ensure minimal movement required to avoid the effects of Deafening Screech and, once you’re playing at Adept league or higher, Necrotic Wave.
When Sinthara begins to cast Deafening Screech, make sure to line of sight her by moving in a way to put the mast between your character and Sinthara. By line of sighting her, you prevent the damage dealt to you and, thus, preserving your healer’s mana and/or cooldowns.
Sinthara’s melee attack does not cleave, so you should be safe to stand on top of your tank, if necessary. When you see Binding Strike about to be cast, make sure that you are close to the tank. If you see the Binding Strike on you, move so that you are on top of your tank to prevent damage.
Undertow is a debuff that should be a priority for your party. Not managing Undertow and it’s subsequent effect, Watery Grave, can lead to a battlefield full of unsafe areas to be in. If you have the Undertow debuff, make sure to move to the edge of the arena. Healers should avoid dispelling until the affected players are in a good spot to drop the Watery Grave AoE.
Once Sinthara reaches 50% health, she will disappear from where she is currently and teleport to the edge of the ship. When she does this, make sure to tether yourself to the mast before she casts Siren Song. Be careful not to un-tether yourself by clicking too many times. If you click on the mast and see a cast bar show up, you should be all set. You can also check your Buffs for a “Tethered” buff represented by an anchor. If you’re not tethered to the mast once Sinthara begins her Siren Song, you will be lured towards her and into the abyss below.
After she completes her Siren Song, the party will be affected by a un-dispellable DoT until the fight ends. It is recommended for DPS to use their Spirit Abilities to try to take her down as quickly as possible during this phase.
Once you reach Adept+, Sinthara will begin to use her Necrotic Wave. It will center on one party member. If it is centered on you, you must use the mast to line of sight Sinthara to avoid being pushed out of the arena and into the abyss. Necrotic Wave also does a significant amount of damage. If this ability is not centered on you, try to avoid it as best as you can. Either by standing behind the mast with the target, or being outside of the ability hitbox.