Dungeon curses in Fellowship are one of the many things that set it apart from other games in similar genres. While we as gamers are all too familiar with difficulty-increasing mechanics, Fellowship compliments the negative effects with positive ones with a system known as ‘kiss-curse’.
Fellowship Dungeon Curses
There are currently eleven dungeon curses that will both challenge and buff your heroes as they progress through the leagues of Fellowship. Dungeons will begin with one curse as early as Adept, increasing to two curses in Champion. You will never have more than two curses on a dungeon, and you will never have double of the same curse on a dungeon.
The curses on dungeons will rotate, meaning you may have a particular curse on Stormwatch Adept 1, but you could have a different curse on Adept 3. This increases replayability by ensuring as you progress through the leagues, you will get different gameplay from the same dungeon.
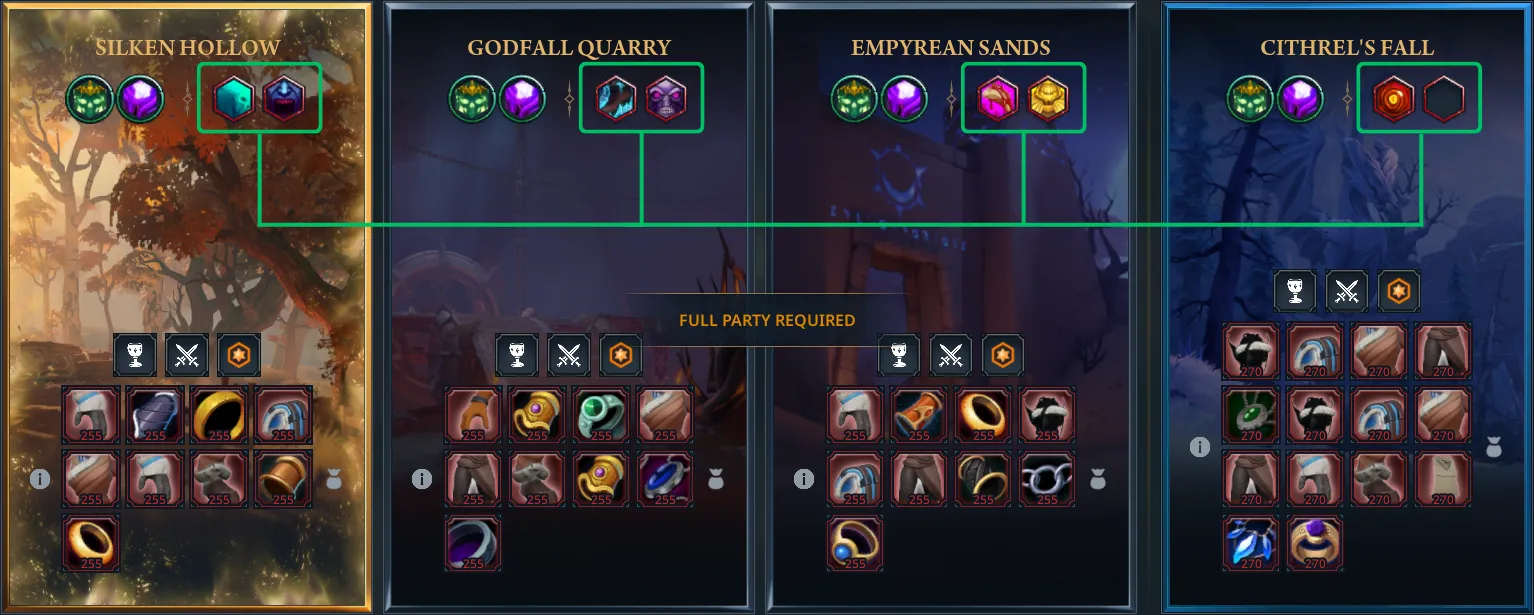
As you can see, you’ll have a variety to choose from as you progress. When you get into Eternal, you’ll have a choice between the one-boss and three-boss dungeons, but the one-boss dungeon will always have at most one curse.
Fellowship Dungeon Curses
Here are all the dungeon curses available in Fellowship. We’ve included all their bonuses and we’ll go over each one individually below.
| Icon | Name | Description |
|---|---|---|
 | Binding Ice | Periodically, one hero is afflicted by an icy curse. After 5 seconds the curse erupts, dealing magic damage to all heroes within the radius and rooting them for 3 seconds. BONUS Enemies also take damage from Binding Ice |
 | Blood Shards | Blood Shards erupt from dying enemies, dealing 2% of their maximum health in damage to all heroes. BONUS Heroes hit by Blood Shards gain 1% Expertise for 30 seconds, stacking up to 15 times. |
 | Anomalous Orbs | Three Anomalous Orbs spawn near enemies periodically. The orbs are targetable and can be damaged. Once spawned, the orbs cast Detonate, an interruptible cast that deals heavy damage to all players if left unchecked. The Anomalous Orbs are susceptible to all forms of Crowd Control, which will also interrupt the cast of Detonate. Anomalous Orbs take 400% increased damage while not actively casting Detonate. BONUS Each Anomalous Orb players destroy grants +480 Gem Power to the corresponding color of the Orb that was destroyed for 45 seconds. |
 | Empowered Minions | Several enemies in each dungeon are empowered, gaining +100% Health and +150% Power. BONUS Upon defeating an Empowered Minion heroes gain +20% Haste and +20% Movement Speed for 40 seconds. |
 | Storm Shield | Periodically, players will charge up with red lightning for 8 seconds, after which a massive bolt strikes all players lethal damage. For the 8 seconds that players are charged up, players are granted Storm Shield, reducing all damage taken by 50%. In addition, damage is split with other players near you. BONUS Players who survive the massive bolt are granted Storm’s Fury for 20 seconds, granting +20% critical strike chance. |
 | Meteor Rain | Periodically, burning meteors crash down on heroes, splitting up into fragments that damage and stun on impact. BONUS Each time a meteor strikes the ground, heroes generate 2 Spirit towards their Spirit Ability. |
 | Shadow Lord’s Trial | The Shadow Lord has intervened, accumulating all kill score. As enemies are killed, Shadow Orbs are spawned nearby that can be collected by heroes. Upon collecting 30x Shadow Orbs, an Emissary of the Shadow Lord will arrive to challenge you. Defeating it will reward Kill Score. BONUS Each time an Emissary of the Shadow Lord is defeated, heroes gain Shadow’s Defeat for 60 seconds, increased all damage dealt by 20% and increasing Haste and Movement Speed by 20%. |
 | Stone Skin | Non-boss enemies have 30% increased Maximum Health BONUS Non-boss enemies explode on death, dealing 15% of their maximum health as physical damage over 6 seconds to all other enemies and bosses in an area around them. This effect does not stack. The highest damage Stoneskin effect overwrites existing ones. |
 | Ultimatum | Bosses deal 5% more damage and have 10% more health. BONUS Heroes’ ability cooldowns are reduced by 10%. |
 | Ghorn the Avalanche | Ghorn the Avalanche is waiting for you somewhere in the dungeon. If you challenge him in combat and defeat him, he will assist you. BONUS Defeat Ghorn to gain Ghorn’s Boon and gain back 20 seconds to the Dungeon Timer. Ghorn’s Boon Ghorn will join you periodically while in boss encounters and help you. |
 | Eira the White Witch | Eira the White Witch is waiting for you somewhere in the dungeon. If you challenge her in combat and defeat her, she will assist you. BONUS Defeat Eira to gain The White Witch’s Boon and gain back 90 seconds to the Dungeon Timer. The White Witch’s Boon Eira will appear near you every 120 seconds and spawn a Winter Rune on the ground that persists for up to 30 seconds. When a player steps on the rune, they gain an absorb shield equal to 50% of their maximum health. While the shield is active, they take 50% reduced damage and are slowly healed. |
All Dungeon Curses
Dungeon curses will potentially be a determining factor in what dungeons you will want to run so knowing the ins and outs will help you make a educated decision. Don’t be afraid of trying them out though, you never know what you might accomplish if you try hard enough.
Binding Ice
This curse will spawn on a random player as frequently as every 35 seconds and as infrequently as every 50 seconds. Once applied, the curse will last 5 seconds before exploding and rooting all players within a 6yd radius. Additionally, the explosion deals damage to both players and enemies.
We feel the benefits from this curse do not outweigh the negatives. You could end up rooting an ally at an inopportune time or outright killing them with the damage. The damage dealt to enemies is negligible, so we recommend not going out of your way to keep the enemies within the circle.
While it’s not amazing on the offensive front, this curse isn’t too difficult to manage. Don’t be afraid to choose it if it comes up.
Blood Shards
Blood Shards spew out from enemies upon death, dealing damage equal to 2% of their maximum health to players. More importantly to us, it also applies a 1% Expertise buff to each player hit, stacking up to 15 times.
Since the damage scales with the maximum health of the enemy, you’ll need to be careful in large pulls on higher difficulties. Killing several enemies at once can be extremely dangerous. Diminishing returns do not affect the Expertise you receive from this effect, so you get a full 15% damage and healing effect for 30 seconds at maximum stacks.
We like more damage, and this gives us that. Generally okay to pick at all difficulty levels as long as you take into consideration what we said above.
Anomalous Orbs
Anomalous Orbs curse causes three orbs to occasionally spawn near enemies. Once the orbs spawn they begin to cast Detonate which deals heavy party damage. You can interrupt this, and all forms of Crowd Control affect the orbs. The orbs will take 400% increased damage while not casting, so using area-of-effect crowd control is a great way to burst them down.
The bonus provided by the orbs upon death is a Gem Power increase for 45 seconds based on the color of the orb.

To see what each Gem Power ability does, check out our Fellowship Gem Guide.
Empowered Minions
This curse buffs specific enemies in a dungeon with additional health and damage. These empowered enemies are static per dungeon. This means you will always find the buff on the exact same enemy in Stormwatch, regardless of difficulty.
The extra health means priority damage because even more important, and the increased damage makes some enemies worth avoiding if possible. Skipping Empowered minions is a viable strategy since the buff is sometimes not worth the effort to kill them.
Storm Shield
Storm Shield causes all players to glow with red lightning for 8 seconds, followed by a strike of additional red lighting. The strike deals lethal damage, splitting it among nearby allies. You should stack near your allies for this to reduce the damage you take when you see yourself begin to glow.
If you survive the lightning strike, you gain +20% Critical Strike chance for 20 seconds.
Meteor Rain
Meteors occasionally raid down about the party, telegraphed by an orange circle with arrows pointing in four directions. After a three second delay the meteors crash down, sending meteor fragments in the direction of the arrows. Meteors and their fragments stun players on impact. This Meteor Rain happens approximately every 40 and 55 seconds.

Not only is this curse easily dodgeable, but the additional 2 spirit towards your Spirit Ability is fantastic. In a one-boss dungeon, this can amount to one or two additional uses.
Shadow Lord’s Trial
Shadow Lord’s Trial is a curse that prevents kill score accumulation from killing enemies. Instead of providing kill score, enemies drop orbs on the ground. An Emissary of the Shadow Lord spawns upon collecting 30 orbs from killed enemies. In one-boss dungeons you need to kill two Emissary’s for 100% kill score, and three in three-boss dungeons.

The Emissary of the Shadow Lords themselves pulse damage every 2 seconds, applying a stacking debuff that increases the damage you take from each additional pulse by 5%. You will want to save defensive abilities for the later half of the bosses health when the damage will be at it’s most potent.
The buff given by defeating an Emissary is incredibly powerful. You can use it to perform pulls you wouldn’t otherwise be capable of, or you can kill a boss faster by defeating the Emissary right before.
Stone Skin
All non-boss enemies have increased health, but these enemies will apply a damage-over-time (DoT) effect on other nearby enemies upon death. The DoTs do not stack, and the more powerful version will override the weaker one.

This curse incentivizes chain pulling to keep the DoT rolling on as many enemies as possible. You want to take advantage of this by pulling high maximum health enemies into another pack right before it dies. You’ll find Stone Skin can do 20% or more of the overall dungeon damage if utilized well.
Ultimatum
Ultimatum is the simplest of the Fellowship dungeon curses, giving bosses more health and damage. However, these small increases can cause certain bosses to become more difficult faster than others. The passive 10% ability cooldown reduction is negligible, especially compared to the extra difficulty the curse adds to the hardest part of a dungeon.
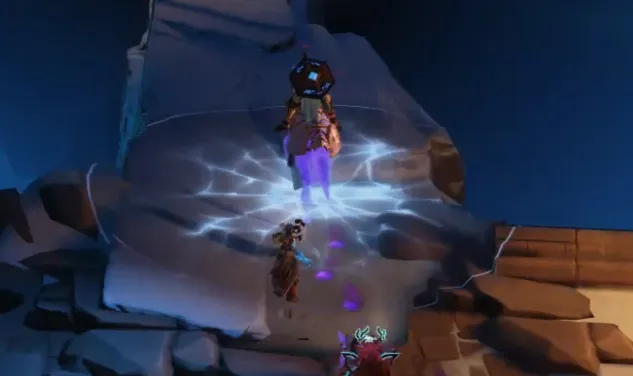
Ghorn the Avalanche
Ghorn the Avalanche is one of two Fellowship dungeon curses to make a return from the winter event. He occupies a specific spot in each dungeon, with a circular rune surrounding him on the ground. Standing in this rune with all four players will telegraph a growing circle, indicating when Ghorn will be attackable.
Ghorn has four abilities to be aware of:
- Crushing Blows: Strikes his current target three times in quick succession. The tank needs to prepare for this large hit.
- Winter Cataclysm: Ghorn will cause a winter storm around himself, pulling everyone towards him. You will need to run away from this and ensure you don’t get too close.
- Icebreaker: Is a large circle soak that applies a damage over time effect on anyone hit. You will want to stand in this to reduce the damage to the tank.
- Freezing Sleet: Occasionally all players will have two frost lines applied to them. You’ll want to position yourself so you’re not hitting your allies while simultaneously ensuring you’re not in the allies lines.
After his defeat, Ghorn will then appear periodically throughout every boss fight after. He will deal damage to the boss before disappearing, speeding up boss fights.
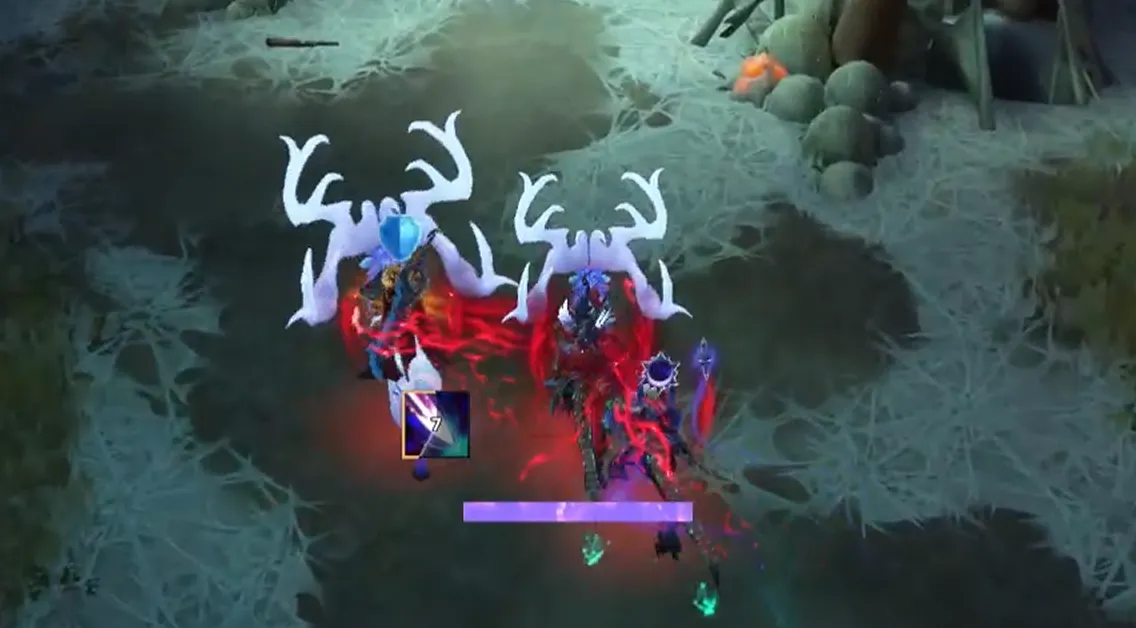
Eira the White Witch
Similar to Ghorn, she appears in specific locations in the dungeons she’s in with similar rune.
Eira has abilities to be aware of:
- Winter Bolt: This is a standard filler spell that you should interrupt when possible.
- Shattering Ice: Spawns ice shards from the sky that impacts a circle after a few seconds. Standing in the circle does damage to you, and the impact causes party damage. Avoid circles and stay healthy.
- Rune of the White Witch: Eira applies an absorb to herself and begins channeling area-of-effect damage to the entire party. Interrupt the channel when the shield breaks.
After her defeat, a small Winter Rune will occasionally spawn near the party. If you step into this circle you gain a larger absorb for 50% of you maximum health. This shield reduces the damage you take by 50% and heals you over the duration.
Additional Information
If you enjoyed this guide and want to learn more about Fellowship, check out our incredibly thorough Beginners Guide to read more!